
Do Your Own Wedding Photo Booth


What’s a wedding without photos? You only marry once, so if you don’t take stunning images, you’ll miss out on a once-in-a-lifetime occasion. Photographs are not only the most exciting part of your wedding day, especially for your guests, but they can also serve as a way to relive your fondest memories.
So, when it comes to planning wedding reception activities, a photo booth should be at the top of your list. And why shouldn’t it be? Not only do guests love them, they can also take home a sweet memory from your special day to cherish for the rest of their lives.
However, if you’re on a budget, you can still create your own DIY photo booths. These are an excellent choice for couples who want to provide something for their guests to pose in, without going over your budget.
As experts in supplying, setting up and operating photo booths with experience in just about every wedding theme you can imagine, we wanted to put together this guide for you. So, here’s how to make a photo booth for your wedding.
What you need
We’ve added links to some of the below in order to help you choose the right items – we are in no way affiliated with any of the external companies.
- Digital camera
- Tripod (optional, but advised)
- Lighting umbrella
- Lighting (optional, but advised if your venue is dark)
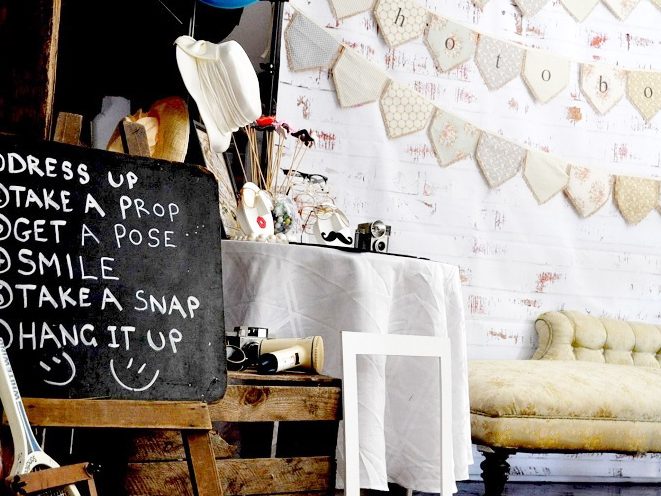
- Props and backdrop (see our wedding photo booth ideas for inspiration)
- Tape
- Hammer and nails
- Large clamps
Ensure adequate lighting
Good lighting doesn’t just play a big part in making photos look professional. It can also make or break the photo booth experience for your guests. Be sure to take a look at where your photo booth will be set up before the big day to find out what the lighting will be like.
If it looks like the area will be a bit dark, you can either purchase or hire a photographic umbrella and spotlight to diffuse the light, giving your guests’ faces a pleasant glow. If your budget allows, these items are recommended to help give your photos a professional look.
However, if you don’t want to use any extra light equipment, switch on the flash on your camera or set a floor lamp beside the camera facing the backdrop. This won’t look as professional as the softer lighting offered by the umbrella, but any light is better than no light.
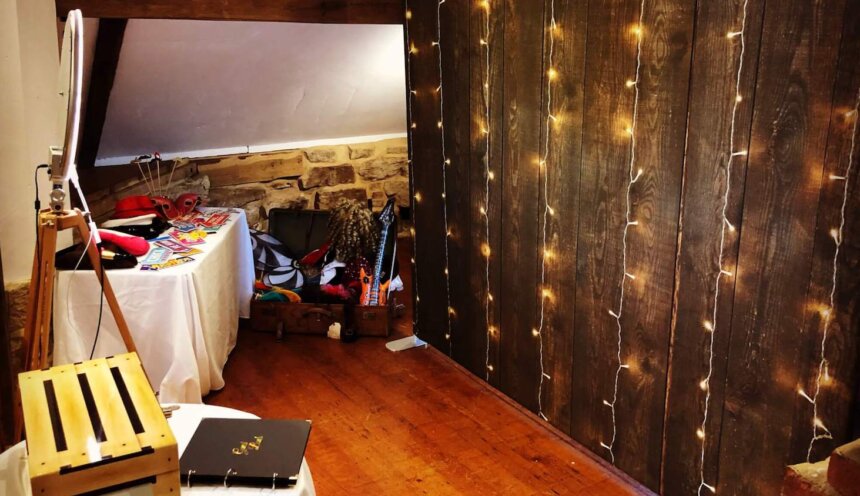
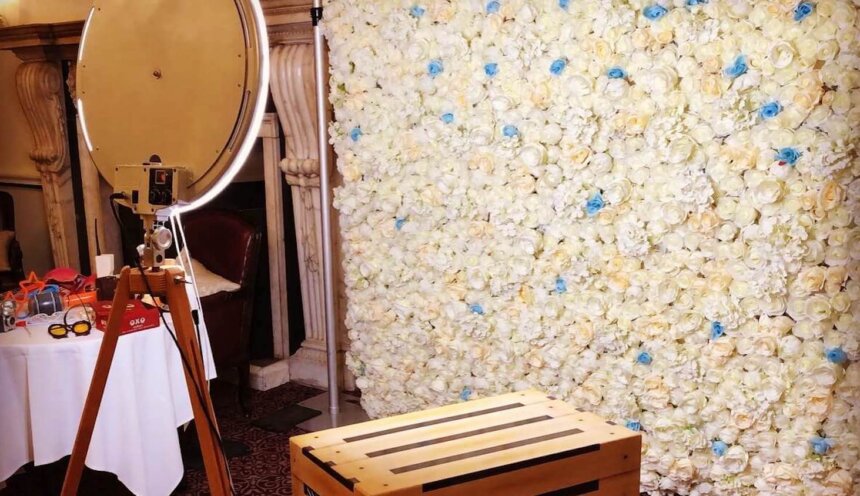
Create a Fun Backdrop
This is the opportunity to think outside the box and come up with creative ideas. Most people use printed fabric backdrops, but why not challenge yourself a little and try something new? Create one that brings the photographs to life.
For instance, you can use a black foam board, gold sequins, and a glue stick to create your very own DIY chevron-inspired backdrop. Trace the chevron stripes using a ruler, then fill in the rows with sequins. However, if you’d like to opt for something more colourful, dye the tips of coffee filters with multicoloured fabric dye and then apply them to the foam board to create a floral-designed backdrop. Explore your creative instincts and the possibilities will be limitless.
In addition to the ideas above, we have a whole blog on wedding photo booth ideas for your backdrop.
Arrange your camera
What’s that one thing that a photo booth party wouldn’t be complete without? That’s correct, a camera. Unfortunately, a camera may be one of the most expensive elements of arranging a photo booth party. But before you decide to eat into your budget on one, consider what you have or borrow one from a friend to keep things affordable.
On the other hand, a Polaroid camera is a terrific way to save money while still capturing your pals in all their glory. This way, you won’t have to be the photographer for the entire evening, and your friends will be able to pick up the camera and start snapping right away. However, be mindful that polaroid films can be costly and it adds up quickly. So, it’s a good idea to limit each guest to only two-or-three photos each.
Install your tripod
While installing your camera mounted on a tripod is the proper way to do a DIY photo booth, it may not be feasible for everyone. Cameras are pricey, and if you have kids running around there’s the risk of a tripod-mounted one toppling over. We urge anyone to consider hiring a photo booth: you might be surprised by the price! However, if you do choose to buy or borrow a camera to do your DIY photo booth, make sure you check if the tripod is able to mount your camera, before committing.
You can install a tripod with appropriate length to reach eye level and a camera with a remote shutter release. With a remote shutter release, your guests can click their own photos, allowing you to relax and enjoy the party rather than spending more money on a photographer to man the camera for the whole event.
Some remote shutter releases have to connect to the camera via a wire and some cameras have an app for remote shutter release. The former is cheaper than wireless and the latter is the most convenient, but it can be awkward for guests to hold a bulky phone and press a button while posing for a photo. A small remote shutter release will have one button and be small enough to hide behind your back.
After your event, the photos can be uploaded to a digital site or app for guests to download.
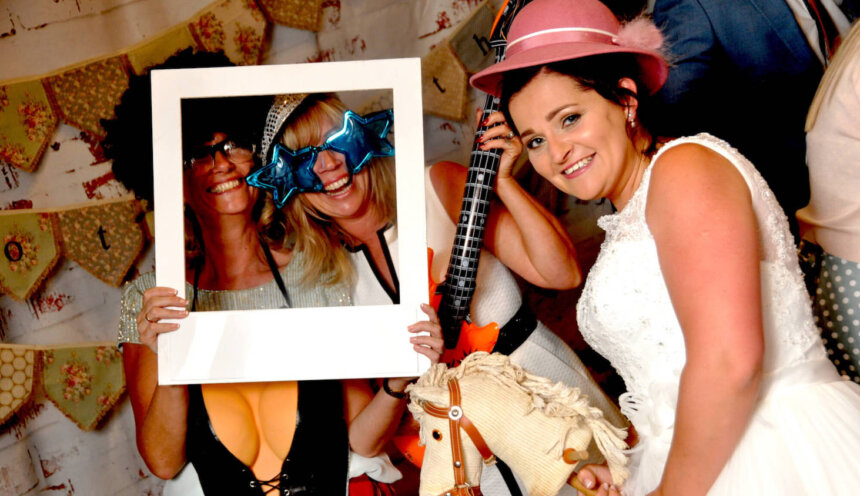
Bring some props
Props are, without a doubt, the most fun aspect of any photo booth. They are not just fun to work with; they enhance the whole picture-taking experience. Make sure you bring a lot of props to keep it fun and guests entertained for hours. We have our own range of fun photo booth props, suitable for both adults and kids.
If you have the creative itch to make some at home, scavenge through your closet and look for hats, wigs, goofy glasses, jewellery, scarves, and anything else that could be used. You can also ask your friends if they have something to contribute to the cause. Another excellent option is to look through thrift stores and costume shops to see if you can find something unique. You can even decide on a specific theme for your photo booth, if you wanted to make your search focused.
Remember: the wilder and funnier it can get, the better.
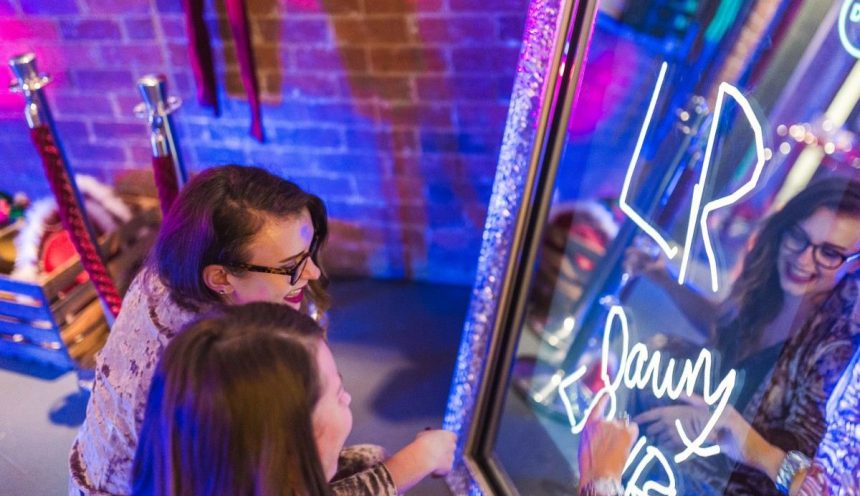
Chalkboards or dry-erase boards are some popular props you might want to keep after the wedding. Guests are free to scribble or write their own messages and wishes on the board. Set up your prop station with objects that visitors can quickly grab and pose. Make a simple sign directing guests to choose a prop and strike a pose. Set it near the prop table.
If guests are taking pictures on their own phone, let them know a unique sign or hashtag they can use when sharing them on Instagram.
There you have it
That’s a wrap! We hope you enjoyed our simple tips for setting up your own DIY photo booth. It should be a fun experience that your guests will flock to and enjoy for hours.
If you aren’t sure about setting one up yourself and would instead like to hire one, please see our photo booth packages.
7. Intimate Wedding Photo Booth
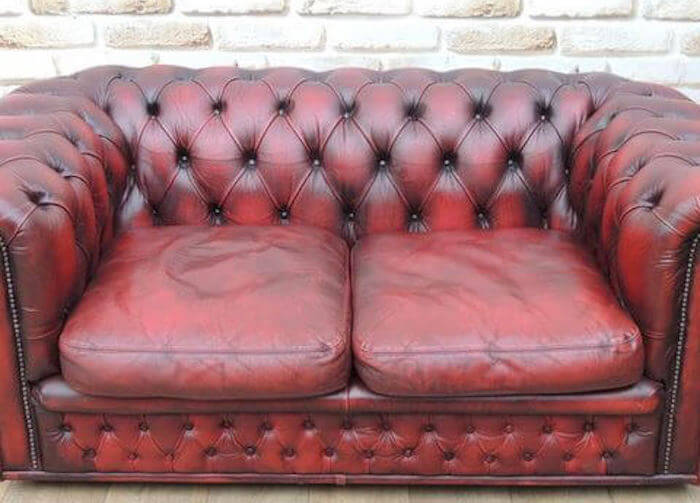
All the wedding photo booth ideas we’ve mentioned so far require a lot of standing. But sometimes you do need to have a sit down. Sitting together on a cosy seat, like this red chesterfield sofa, can change the feeling of your wedding photos, giving a more intimate feel. It’s great if you have lots of families coming.
Warning: This sofa is so comfortable, your guests probably won’t want to stand up again!
8. Peep Through Photo Booth

Peep through boards are always a smash hit with the public at both at a wedding and a local pier. You can hire a peep board to suit any theme for your wedding, from traditional seaside themes to Edwardian wedding caricatures.
If you have kids present, these are a great way to keep them entertained during the wedding reception.
What’s your favourite wedding photo booth idea? Do you have an idea that you think you want to try at your own wedding? Get in contact and let us know, we’re more than happy to help.